How to install it
The application Mobile POS is, at the moment, available only for Android systems.
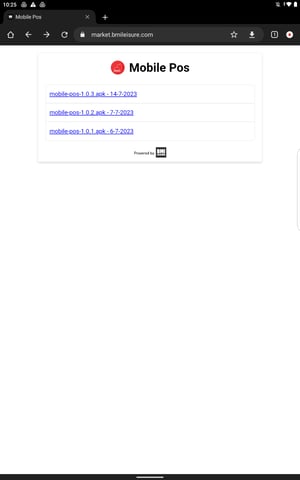
From the device you want to install Mobile POS, connect to the link: Mobile POS, and download and install the most recent version. We provide an apk module so you will need to permit to trust the app after the download.
Once the application is installed correctly, you will see the first screen as follows:
.jpeg?width=300&height=480&name=Screenshot_2023-10-25-10-19-28-903%20(1).jpeg)
How to configure it
You must activate the back-end site (our fast software module) to make the Mobile POS work.
To do so, open the Configurator or the Booking application and set the following settings up:
-
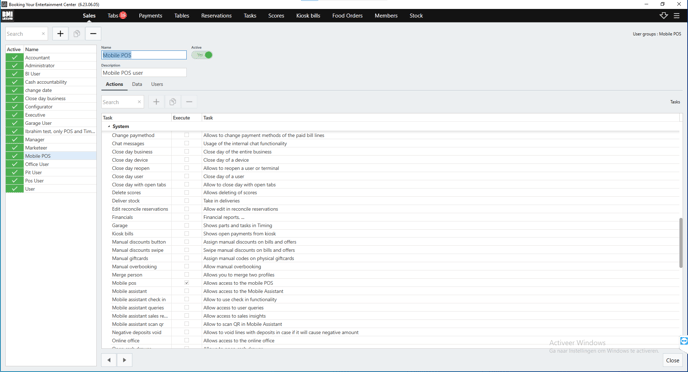
Configure a new user group for the Mobile POS:
Menu → Staff → Configuration → Groups
- Create a new user/ multiple users with login and password for the Mobile POS or assign the user group "Mobile POS" and "Standard User" to the existing users. Be sure to set a username and password; otherwise, it is not possible to enter the application:
Menu → Staff → Configuration → Users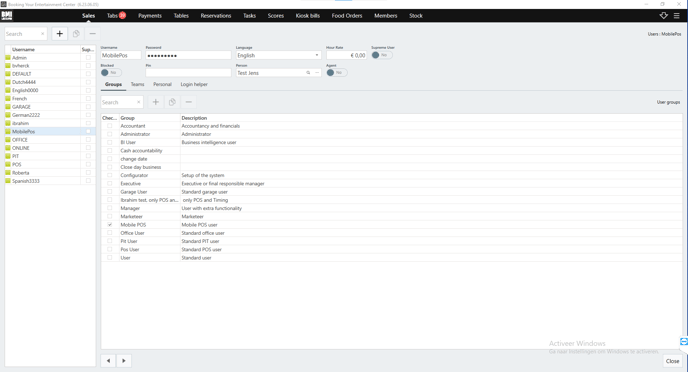
- Enable table management system in the system configuration. This will allow the use of the tables and order from the tables:
Menu → System → Settings → System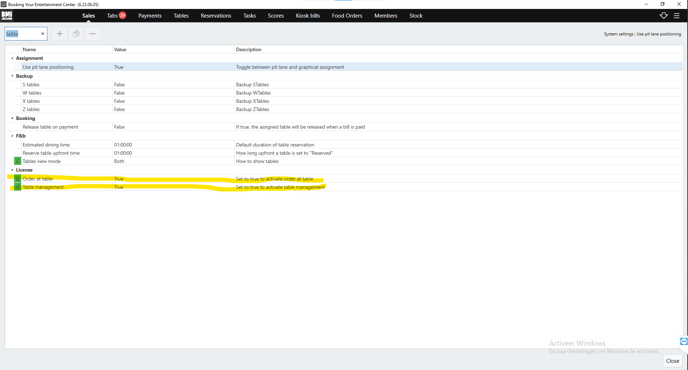
-
Configure tables and floor zones. You can have multiple floor zones:
Menu → Food & Beverages → Tables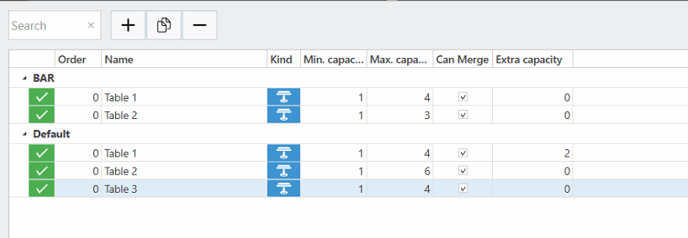
- Configure the menu for Mobile POS. You can configure a new Menu just for the Mobile POS or toggle the existing menu (pages) configuration to appear on the Mobile POS.
If you need help how to configure products and pages, you can find a guide here: https://support.bmileisure.com/support-center/create-a-bookable-product
Menu → Products → Pages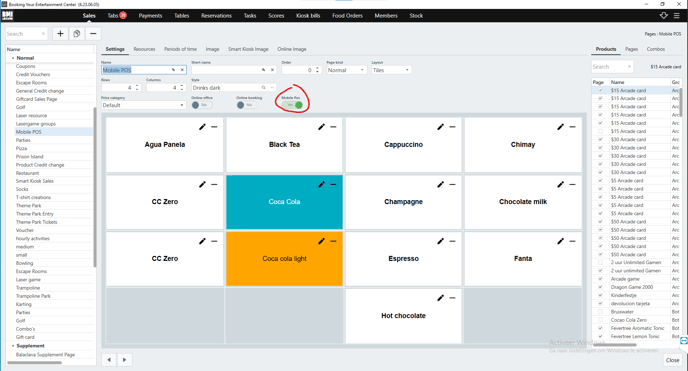
Products can have modifiers and supplements. You can configure minimum and maximum amounts that can/must be booked for modifiers.
To set a modifier, you can consult the guide here: https://support.bmileisure.com/support-center/create-a-modifier-flexible-combo-product Configure the payment method you would like to show on the Mobile POS by ticking the "show on mobile POS" option:
Menu → Products → Configuration → Pay methods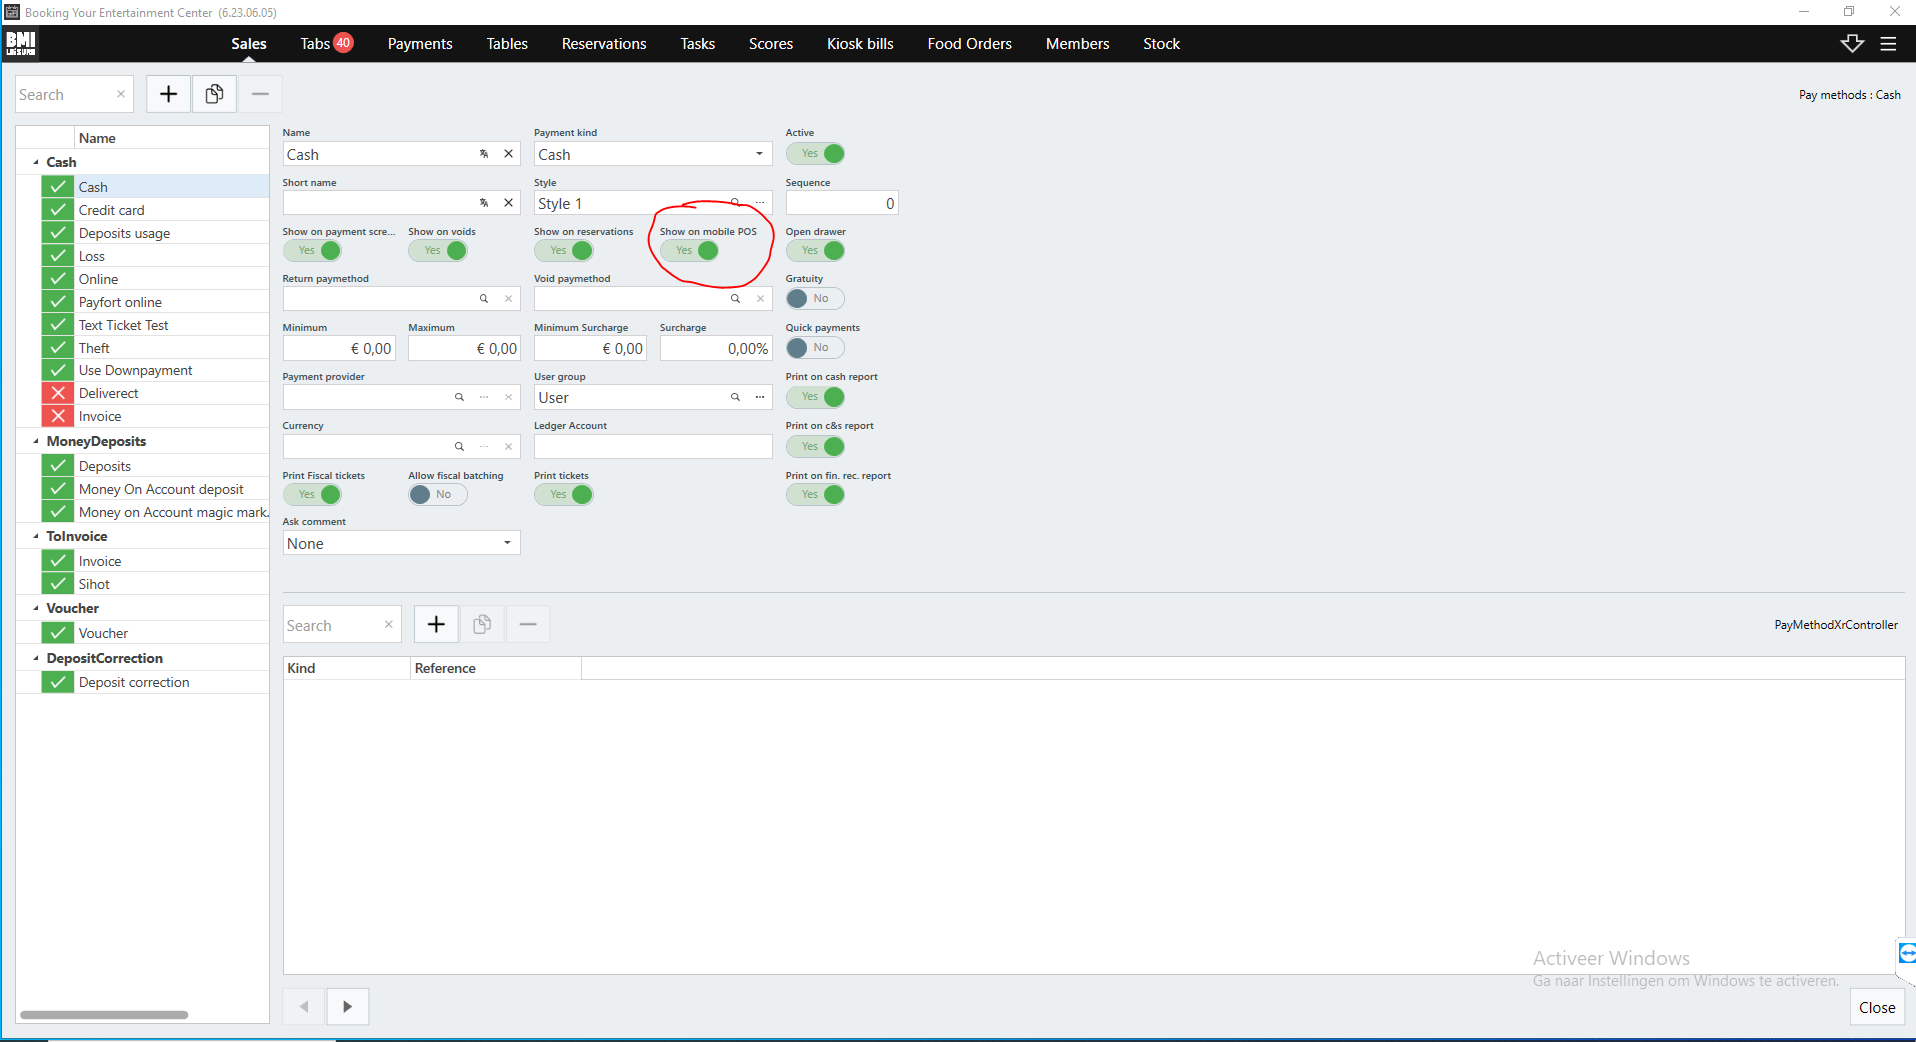
If you arrive at this point, the configuration for the MOBILE POS is done, and you can start using the application. We suggest using it on a little tablet or a mobile phone for the best experience.
How to use it
The MOBILE POS application is a minimal but useful tool to get orders directly from the table and send them to the kitchen and the Booking or Office desk.
If you open the application for the first time, you will need to insert the clientkey of your venue to communicate with our system. For your clientkey, in case you don't know, don't hesitate to contact our support.
The default way to use this application is to have the MOBILE POS running connected to the internet. If your organization wants to set up a local internal network, please contact support to set up the necessary.
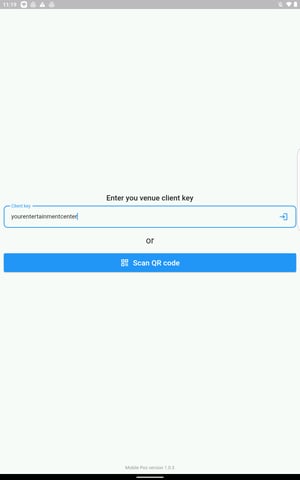
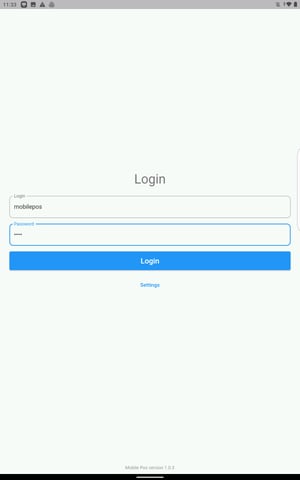
Insert the clientkey and press ok. Remember that you must be connected to the internet for communication to work properly.
Login
If you are connected to the same local network as the Server, before logging in, you have to press "Settings" and add the server's IP address.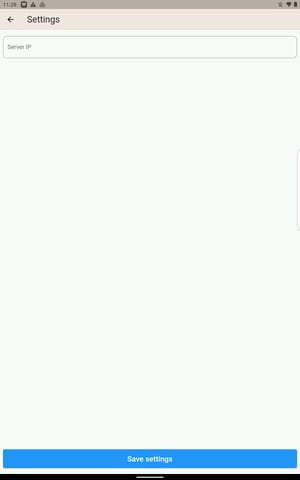
- If you're not connected to the same network as the Server and other applications skip the settings and log in directly.
Insert the credential of a valid MOBILE POS user (configured at the beginning):
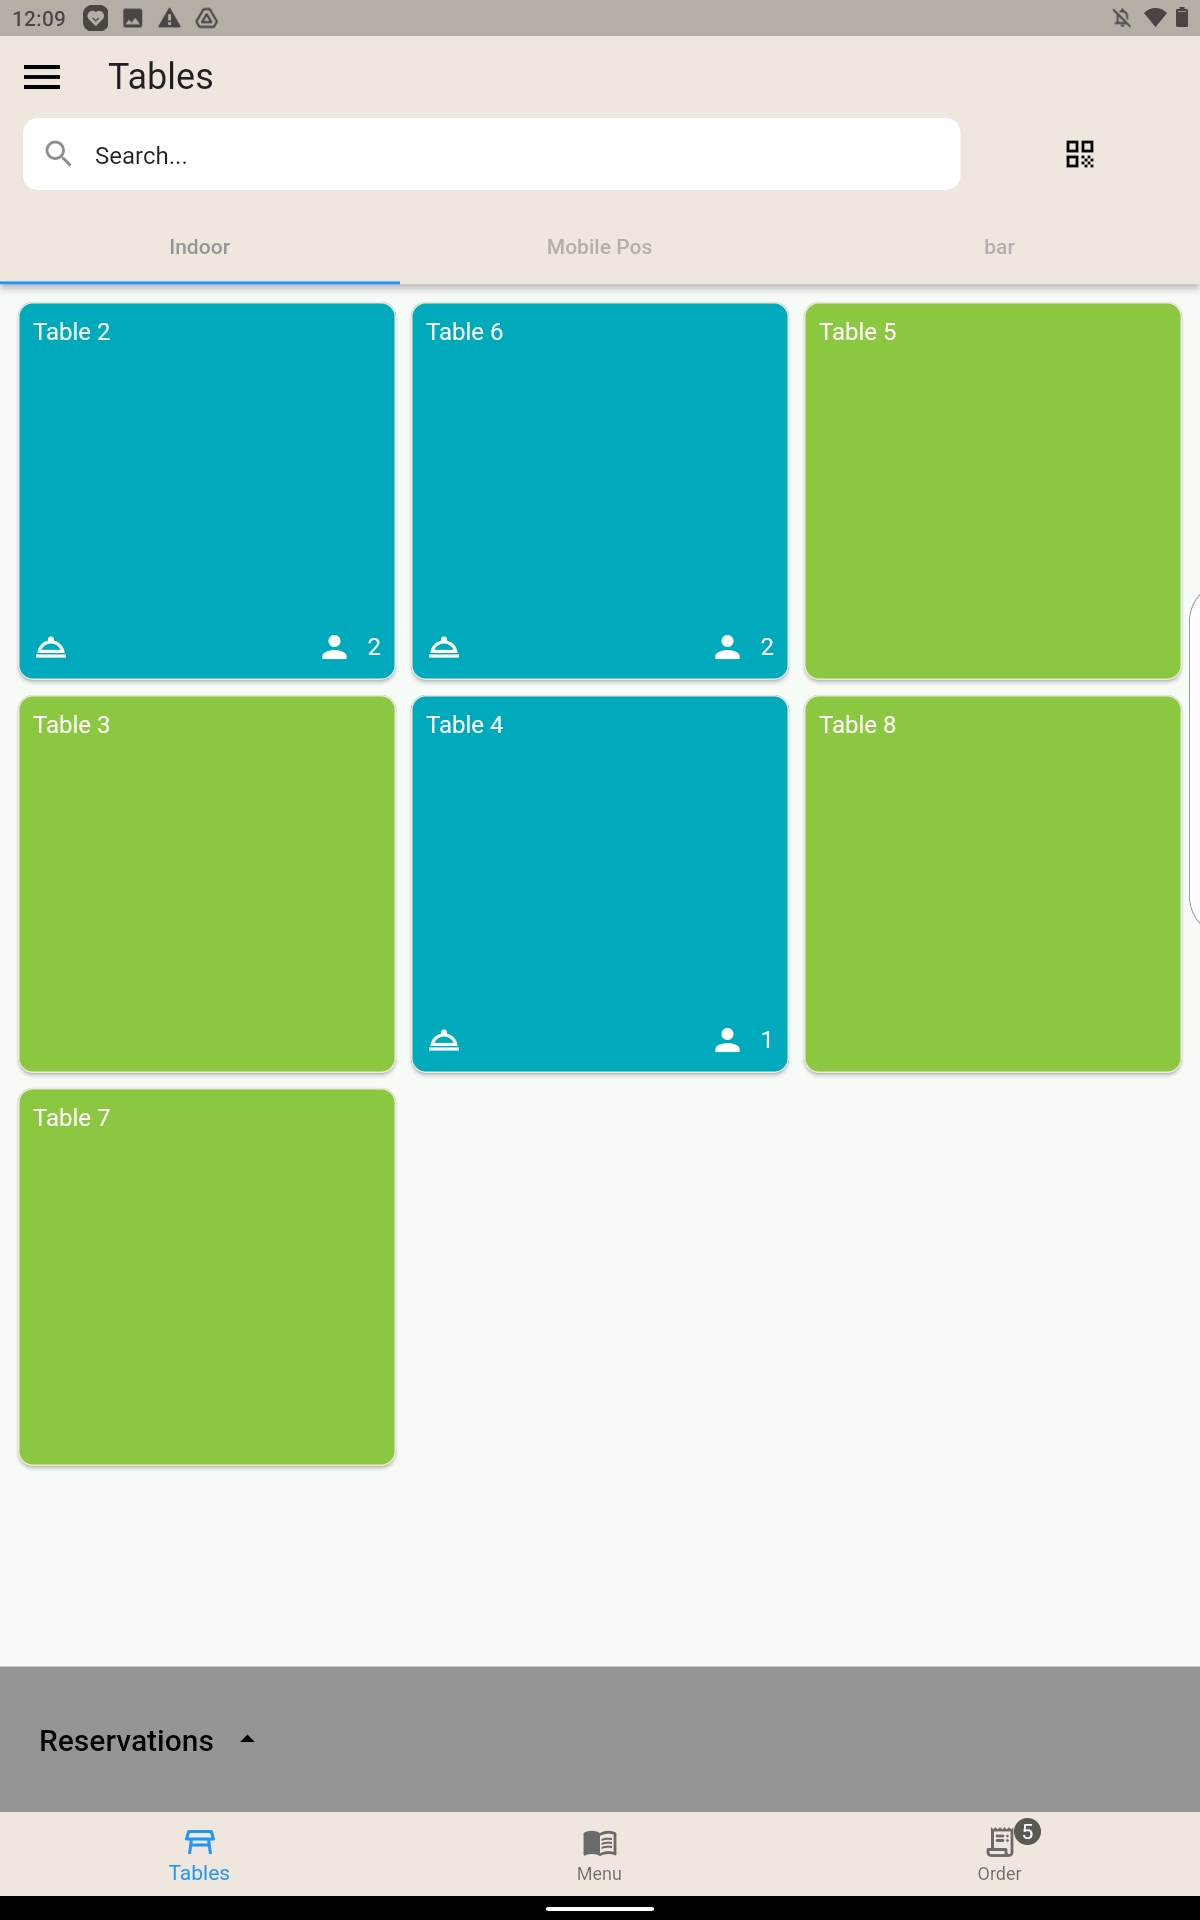
Tables page
The main and first page is the one showing the tables.
You can search or scan a table's QR code, check the day's reservations, and click and assign people to a table.
Tables overview
Reservations
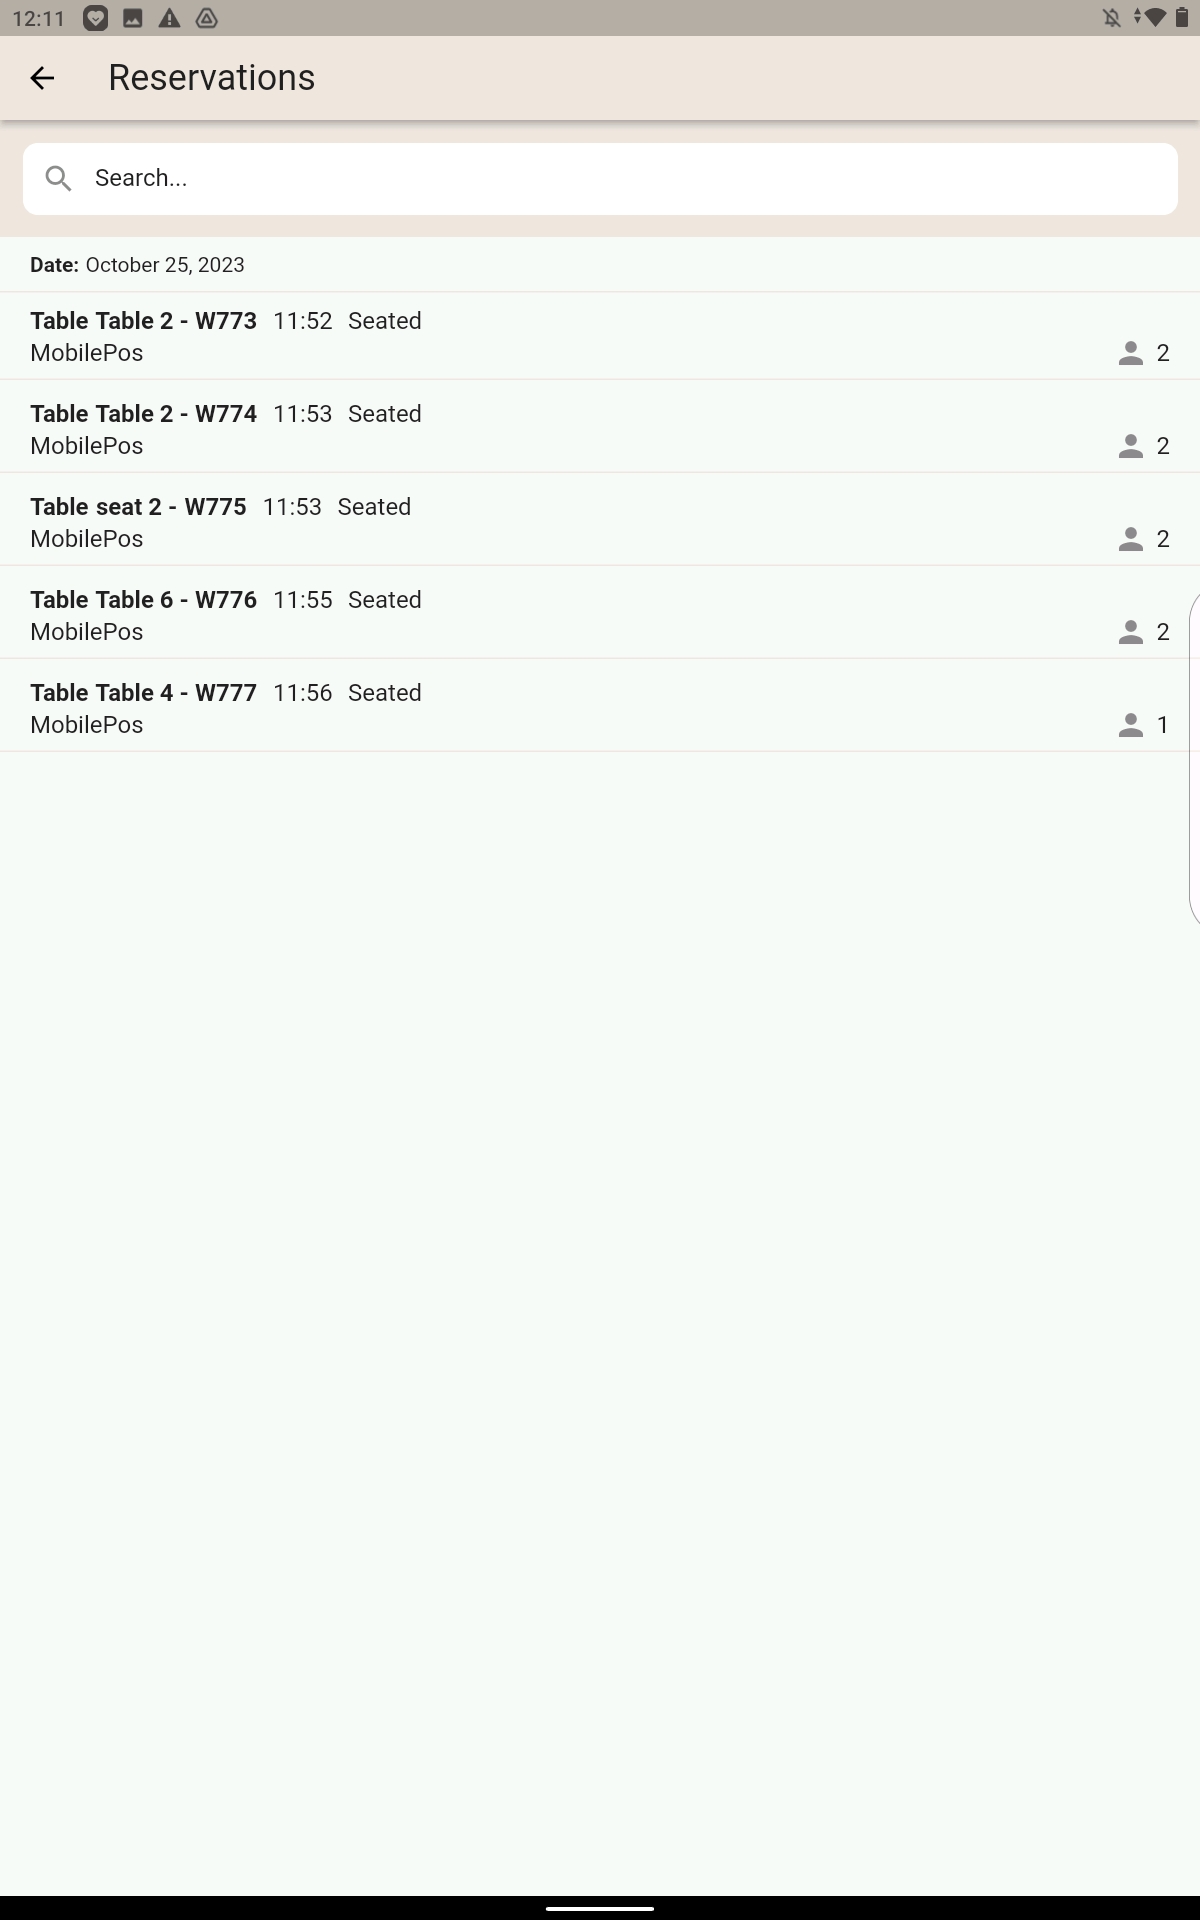
When selecting a table, you can select the number of people as a walk-in or move a reservation to the table.
%20(1)-jpg.jpeg?width=326&height=522&name=Screenshot%20(25%20ott%202023%2011_40_44)%20(1)-jpg.jpeg)
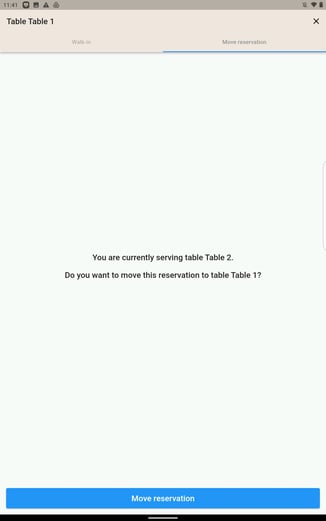
Pressing "Continue" or "Move reservation" will lead to the menu tab.
Menu
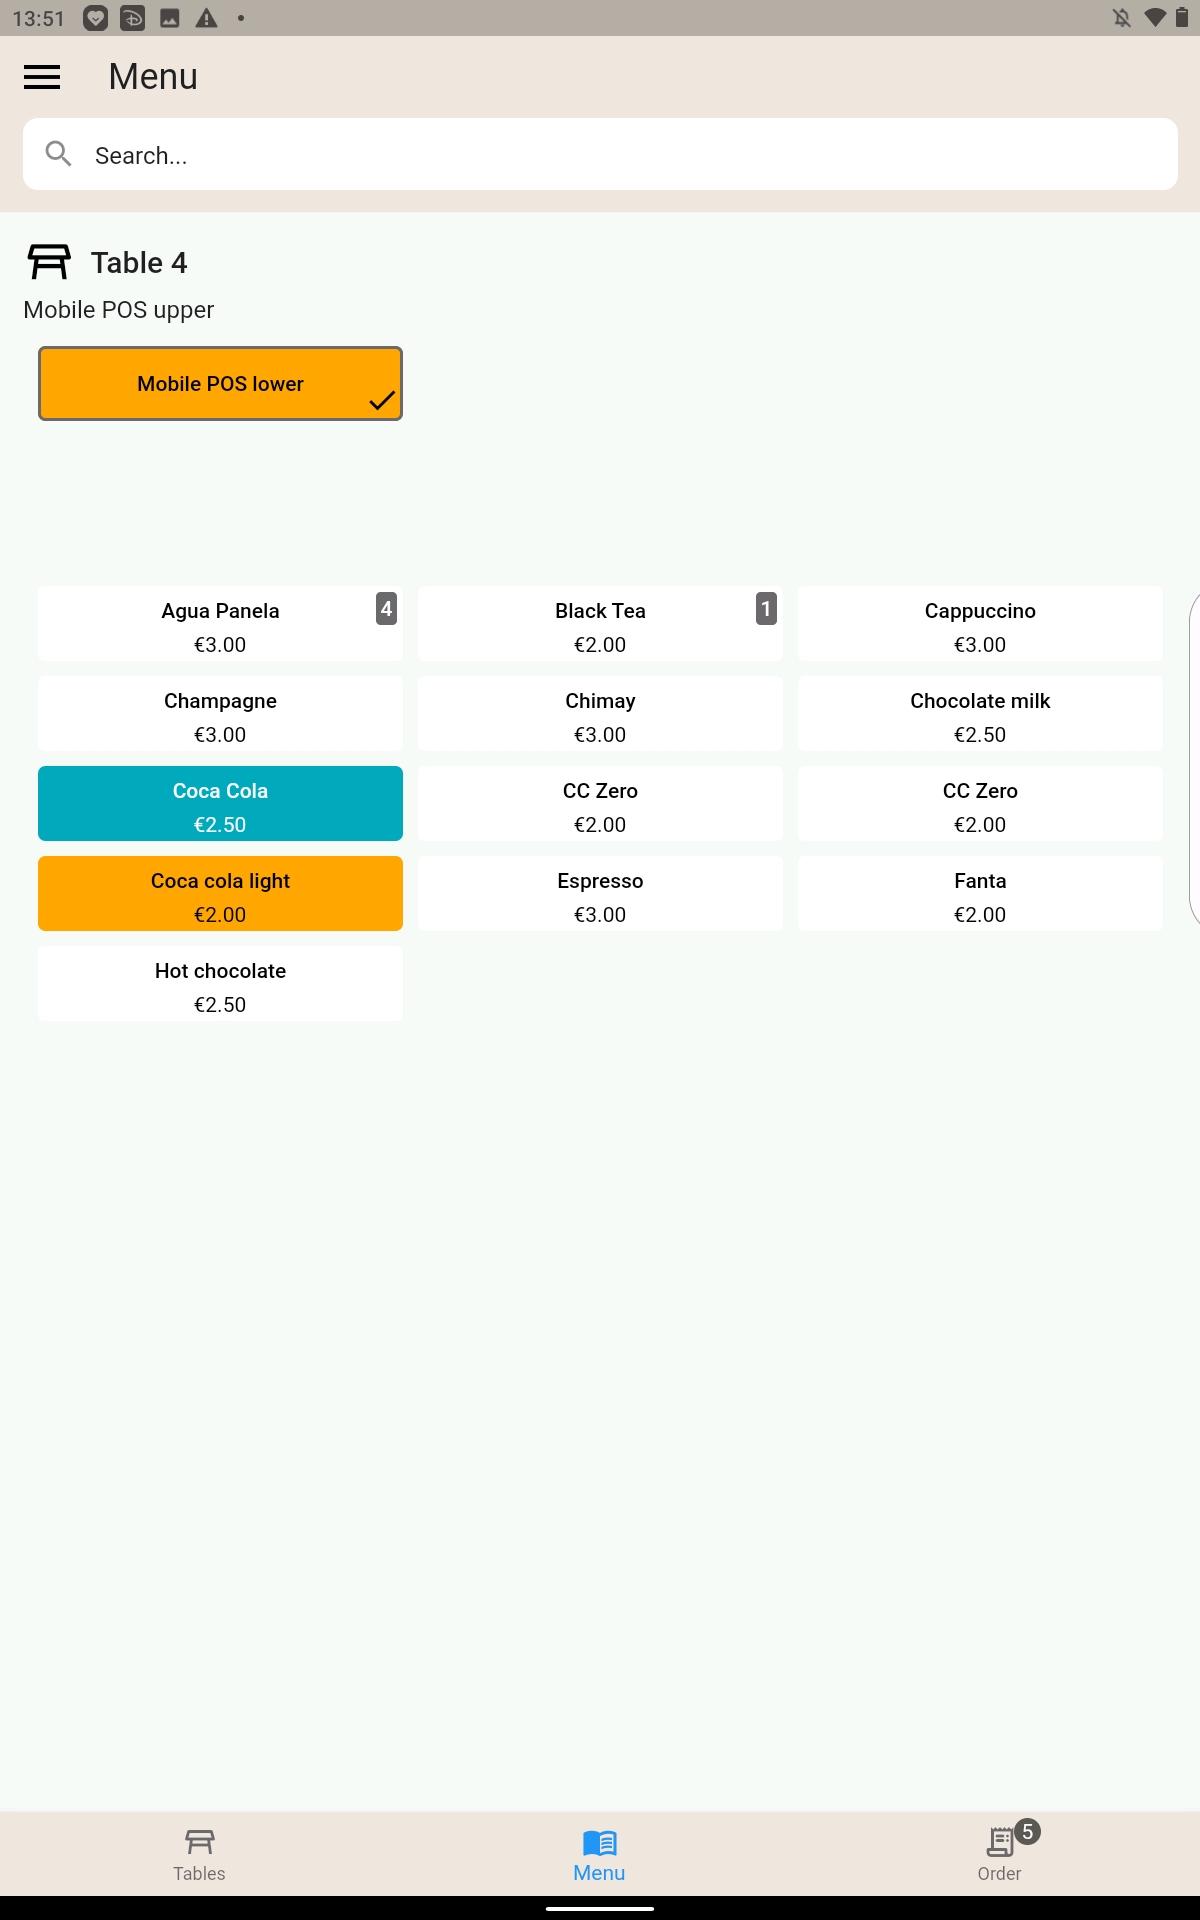
Here, you can select all the products you need to sell. Once you are done, you can tap on the order tab.
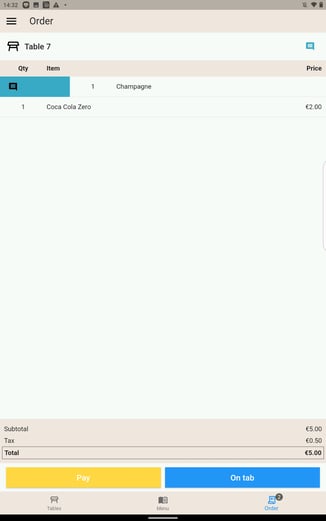
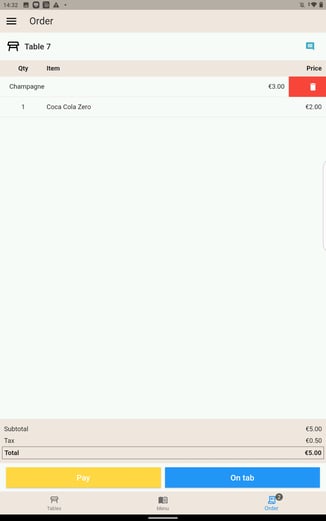
Order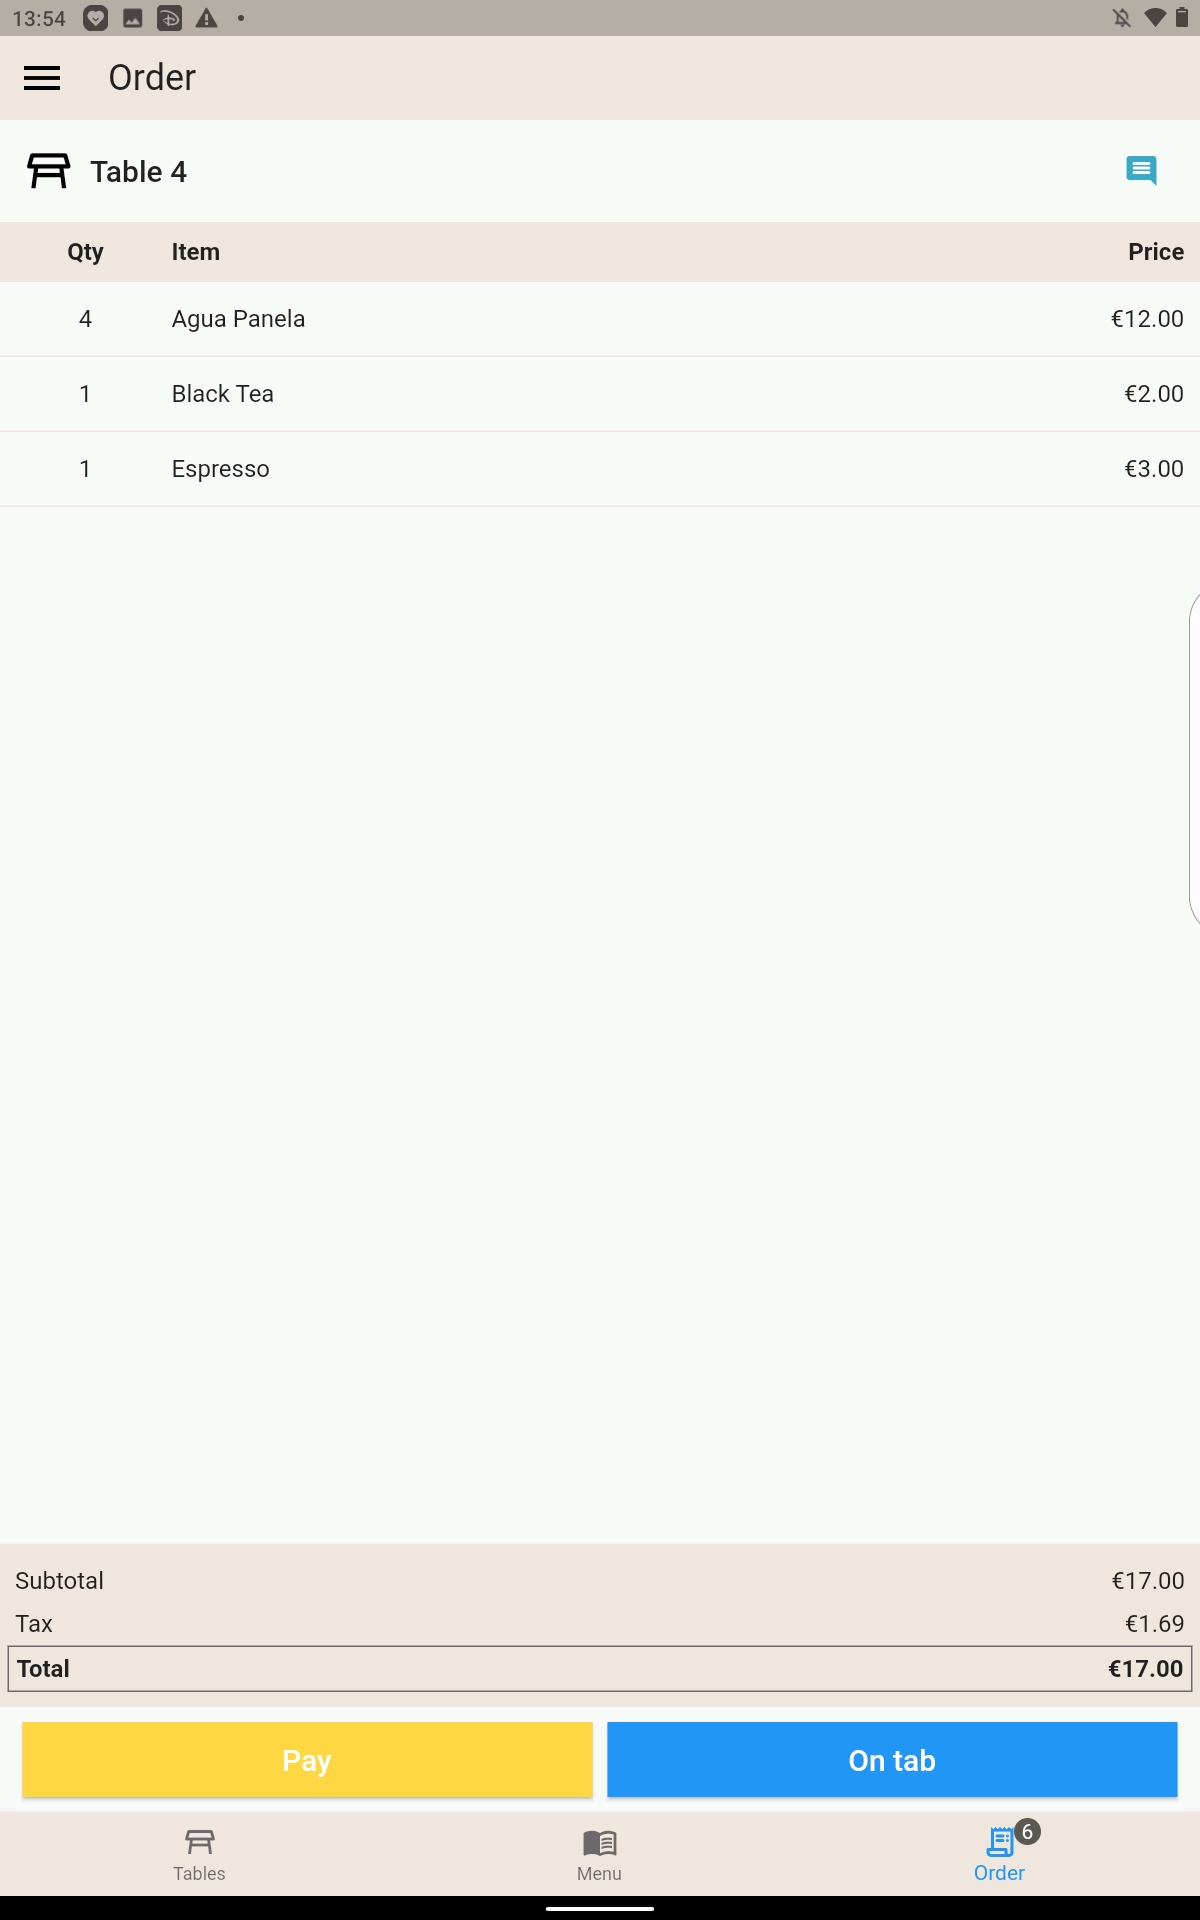
From here you have two options:
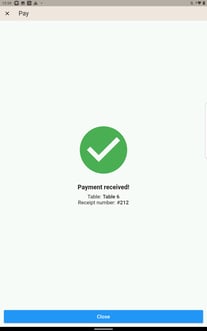
- "Pay" the bill: it will redirect to the payment tab to add optional discounts, generate the ticket, optionally release the table, and process the payment;
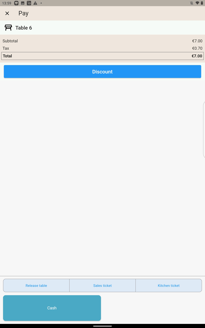

The three blue squared boxes on the paymethod can be disabled or enabled by simply touching on them so that you can release or not the table, print the sales ticket, or generate the ticket for the kitchen. - "On tab": with the same logic of the Booking application put on tab the bill and use it later.
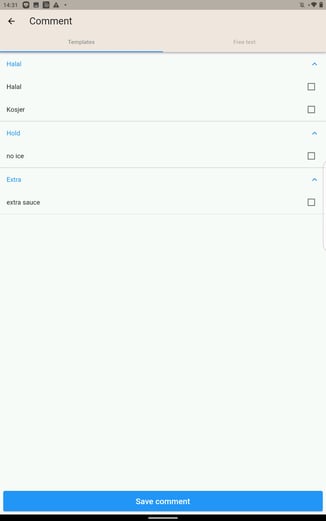
In any moment before the payment or tab you can always add comment or modifiers to the bill and delete or change the products.
Comment on the entire bill (message icon on upper right corner):
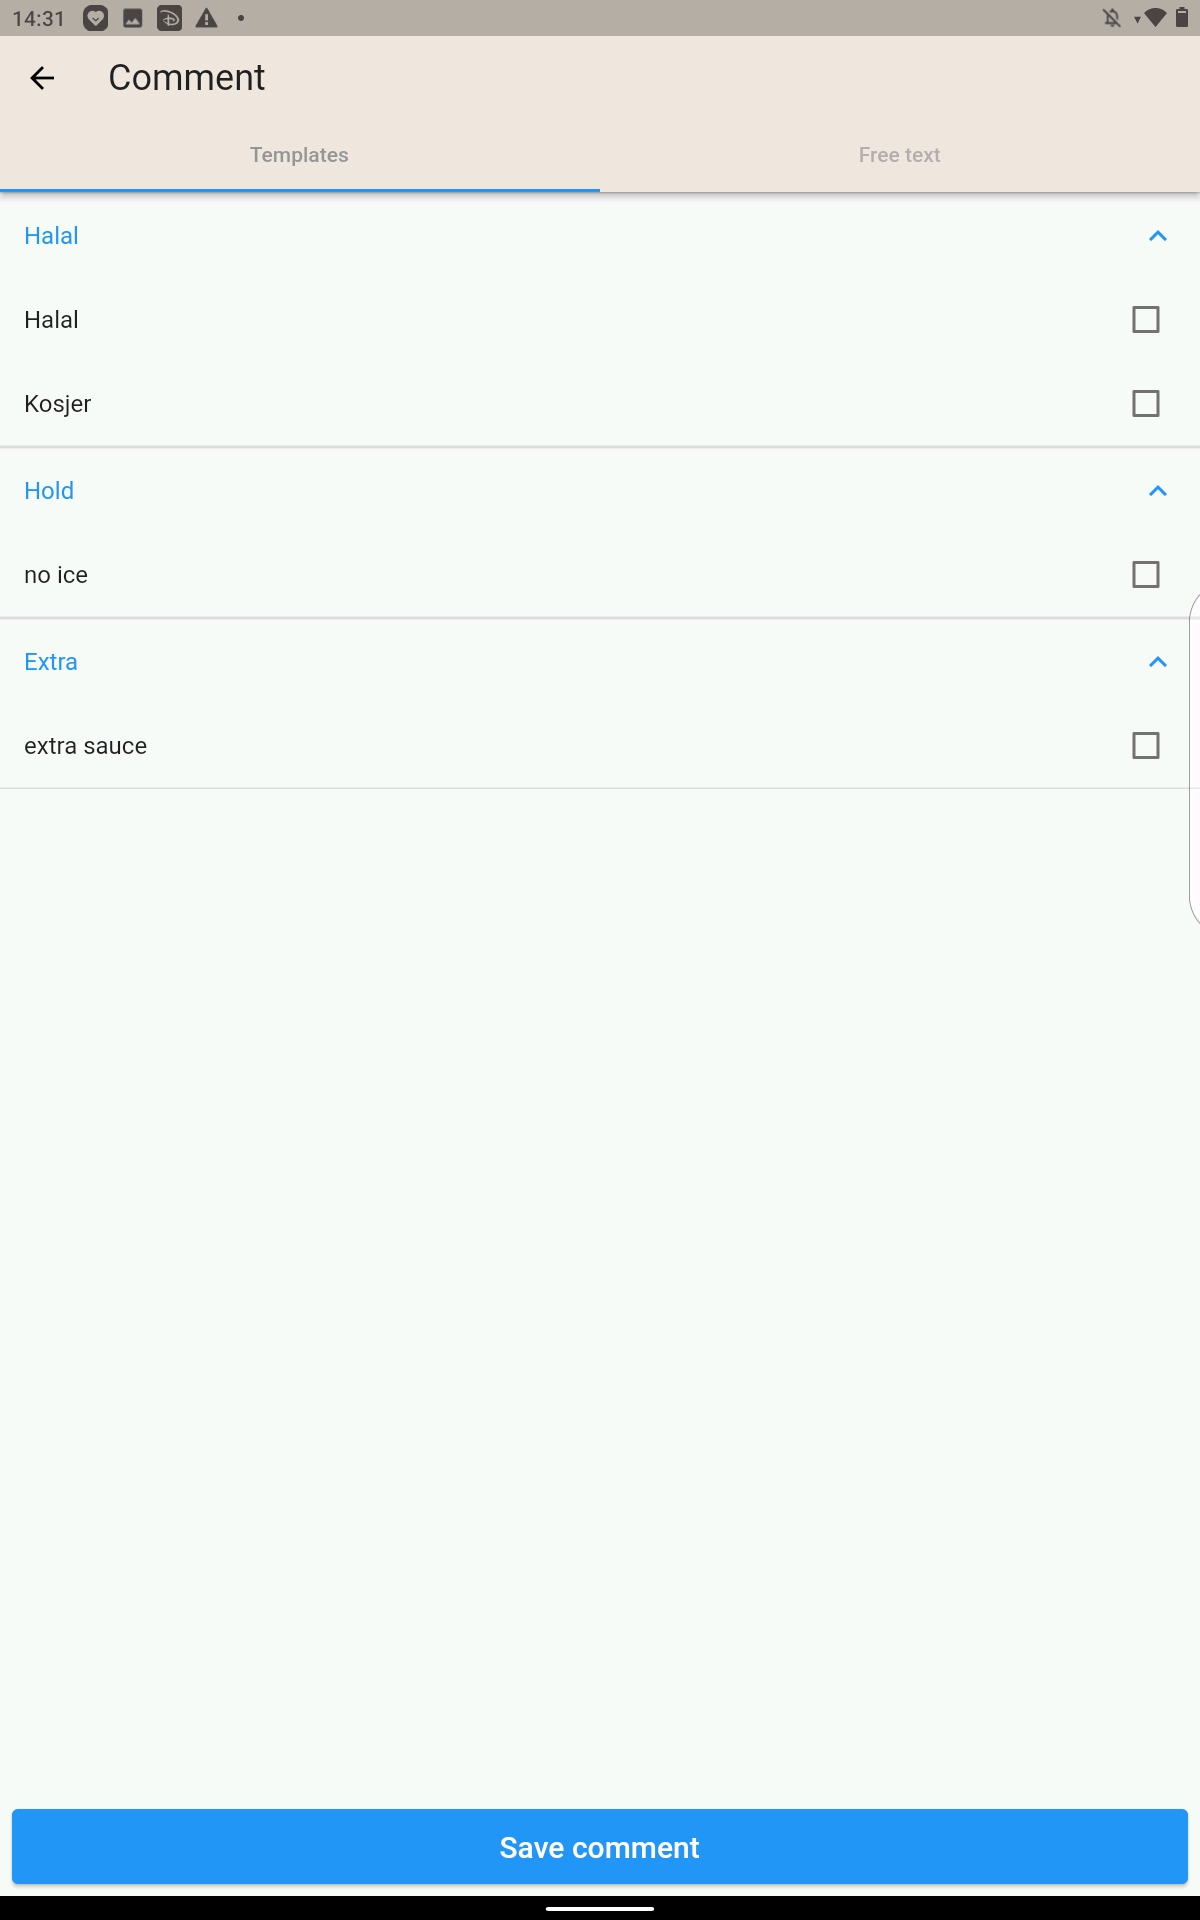
Comment on the single product:
Deleting a line:
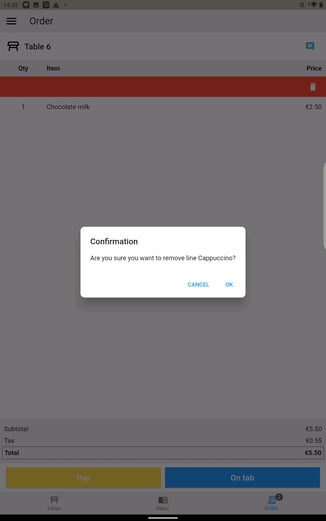
Actions on a product line:
FAQ
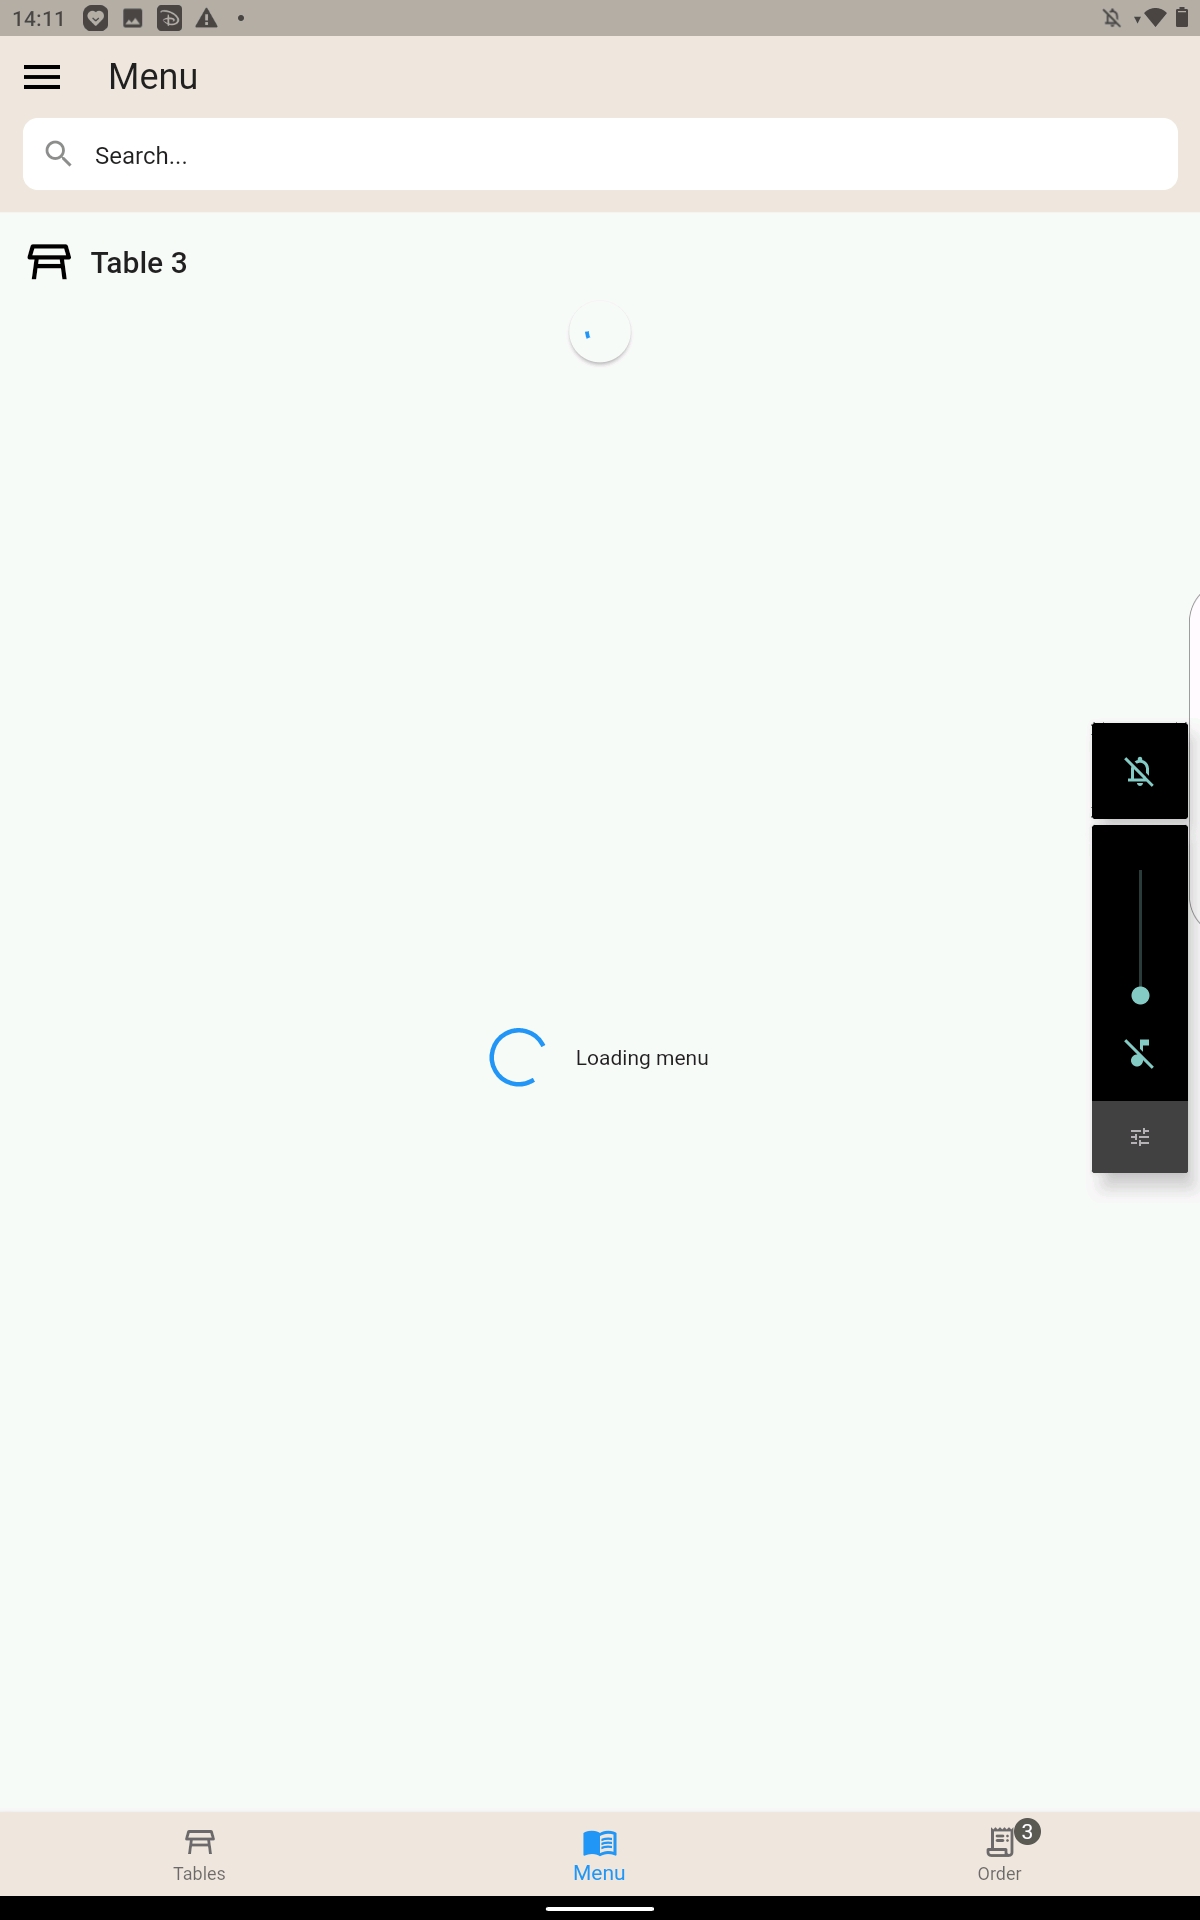
Menu section is stuck on loading message
This can happen if you need to configure the menu correctly with a tree structure page. For example only a page with all the products configured without a main page first that leads to the products, you will not able to load the menu correctly.
How it appears:
How to solve:
By simply add a upper-level page that directs to the products you need to show.
Important to enable only the first upper page of the MOBILE POS option and not the one inside. Otherwise, the menu will not appear.