Introduction
A user is a person working for the company and/or using the software. This goes from the cashiers to the administration coworker who extracts the reports.
1- Create a new user
When you have a new coworker, of course, he/she needs their own profile so they can start working with the BMI Leisure software.
You can create a new user with the following steps:
- Go to the User’s overview screen : Menu -> Staff -> Configuration -> Users
- Click on the + button
- Fill in the
- Username
- Password and /or PIN
- Default Language(this is the language that will be used when the user will be logged in)
- Keep the option 'Blocked' disabled - this disables a user in case you want to revoke his access.
- Select a person from the database with the search button or use the three dots to create a new one.
- Assign user groups to that user according to his needs.
- Select Save / Apply
2 - Adjust a user
Adjusting a person’s name or resetting his PIN code. You can adapt an existing user as followed:
- Go to the User’s overview screen (Staff -> Configuration -> users)
- Select the User (double click)
- Adjust the fields.
- Select Save / Apply
You can enable/disable the user groups to this user by (un)checking the checkboxes.
3 - Delete a user
Once a user has any activities like orders, tabs, or sales, it becomes impossible to delete the User. You can use the 'blocked' option(setting) in the user’s detail page to block the user’s rights. Now the blocked User cannot log in anymore and won’t be shown into the reports anymore.
Advanced setting: User Groups
A user group gives a virtual representation of a group of users with shared responsibilities and/or workload. User groups are used to assign or revoke rights to a group of users. For example, we can make one user group for everybody who works in the pit and assign the user right to remove people from a started race. Then everyone in this user group will be given this user right. When one User finds himself in multiple groups the rights of these groups will be combined.
How to make a User group
You can create a new user group with the following steps:
- Go to the user groups overview screen. (Menu -> staff-> Configuration -> Groups)
- Click on the + button.
- Fill in the name and description fields.
- Assign the allowed actions in the action tab.
- Assign the data the user group is allowed to view and/or edit.
- Save the user group.
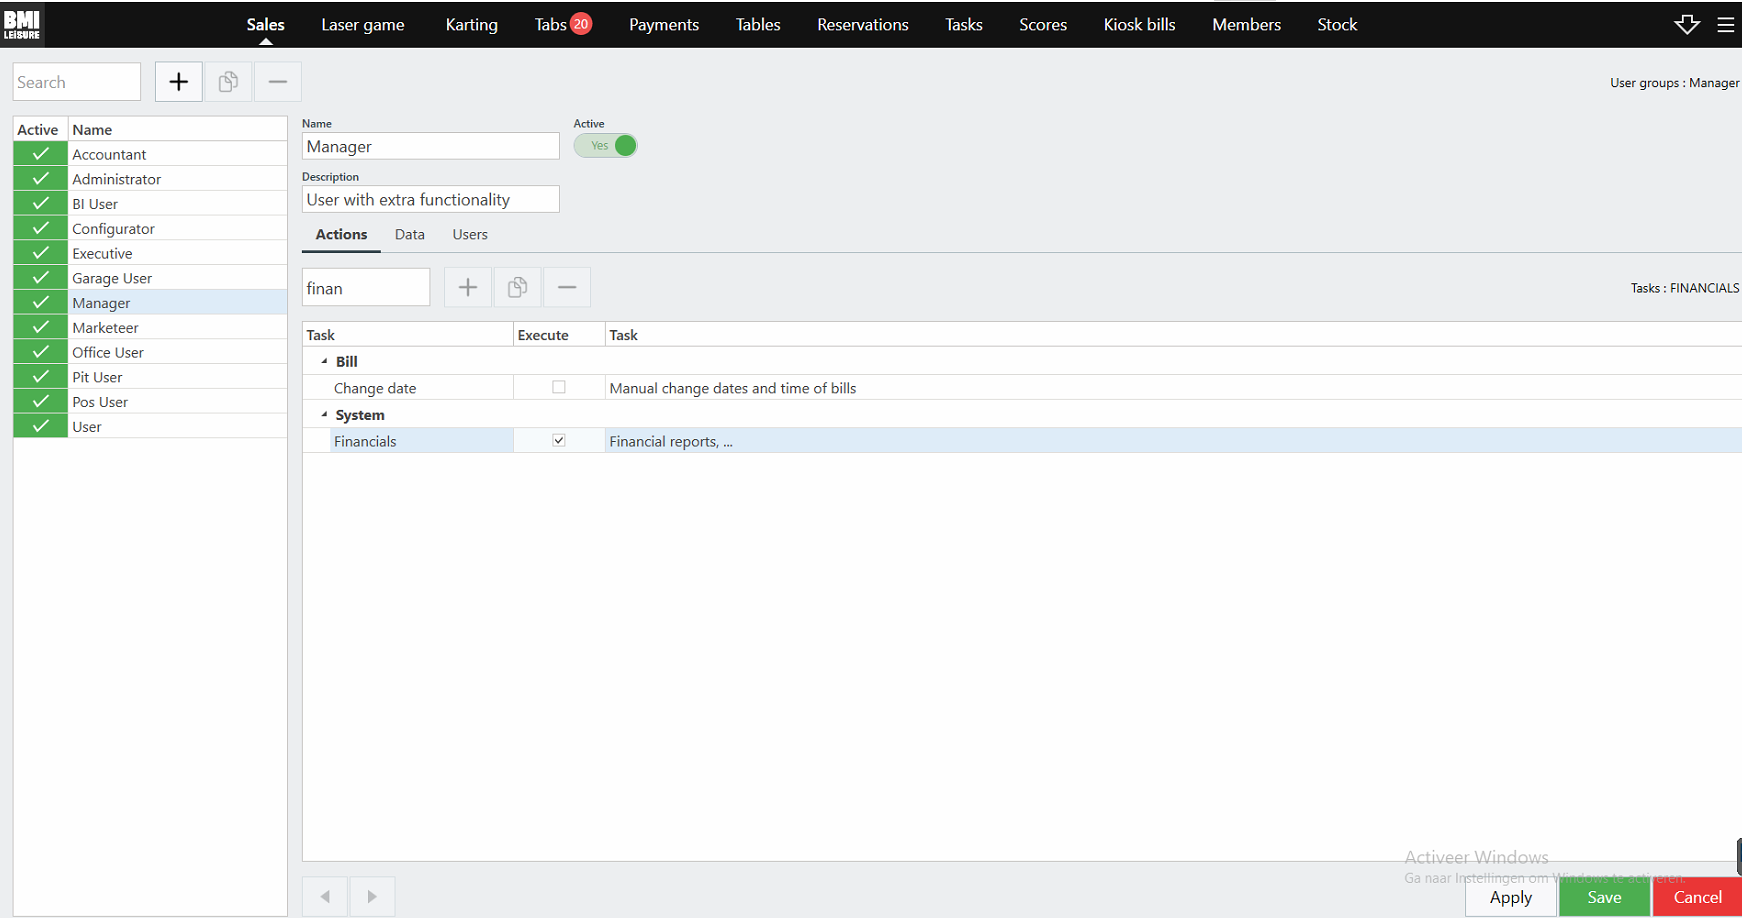
Question: how to set the rights to see access Sales Reports and history?
- In the Menu go to Staff -> Configuration -> Groups.
- Select the group 'Manager' - or the groups you would like to add this right to.
- Type in the search action field: Financials.
- Check the box.
- Now all users linked to this group will have access to this history.