Seven things you need to know about the Simple Stock Management:
- General idea of the simple stock management feature in BMI Leisure software.
- Activating the simple stock management for a certain product.
- Dealing with the new incoming stock.
- Correcting the wrong stock count (if any).
- Adding warning messages mentioning that your stock reached specific limit.
- Blocking the selling of the product when it reaches a specific level of stock.
- Stock Audit (By checking the stock report weekly).
1. General idea of the simple stock management feature in our software?
Processes to stock and manage the inventory, the software lets you track the amount for every product, add new ones and automatically decrease them when sold. It also keeps the history of what has happened.
Stock keeps track of how much of a product is left.
2. Activating the simple stock management for a certain product.
a- Go to Menu >> products >> products >> and then search for the product you want to active the simple stock management for, and double click on it.
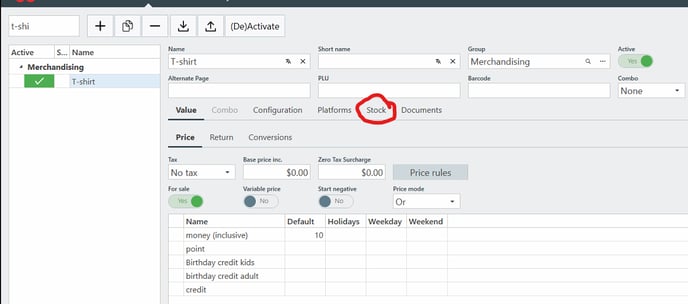
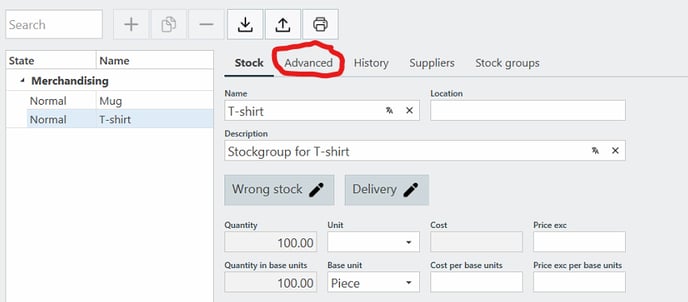
b- Click on the stock tab as you can see below.
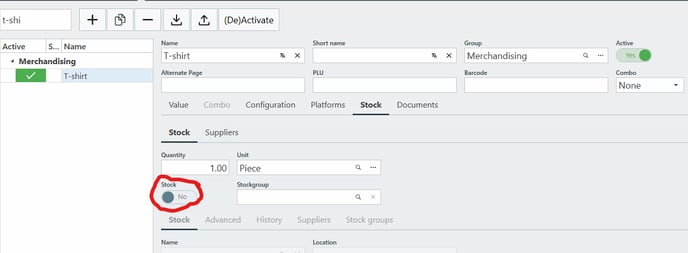
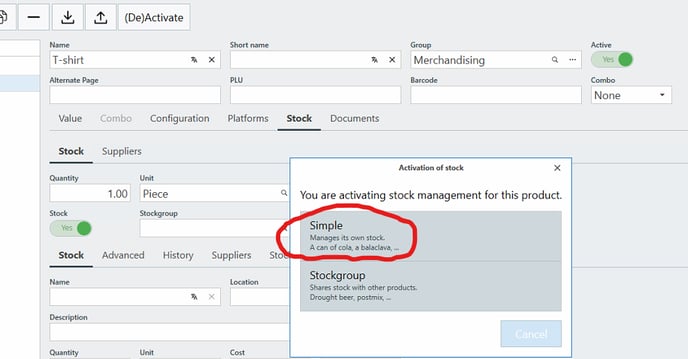
c- Toggle the option of Stock and choose (Simple Stock).
d- Hit (SAVE) for now. Do not start editing anything yet.
e- Open the same product again, and access the (Stock) tab again and now you can start editing what you want. You mainly will be doing the upcoming 4 points.
3. Dealing with the new incoming stock.
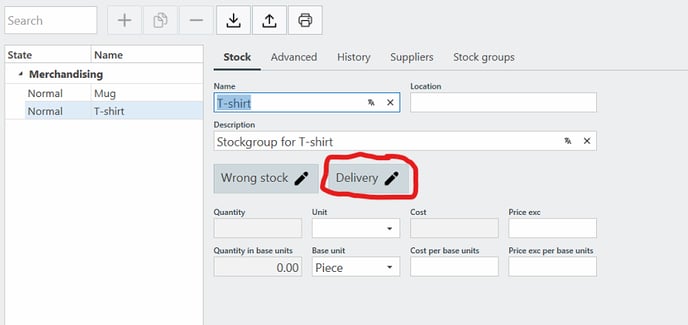
Since you will be having a lot of items that have stock, you can directly go to this main tab of (STOCK) instead of going every time to the product itself in the product list.

Double click on the stock product and click on (Deliver)
Put the correct delivery count, and hit (OK)
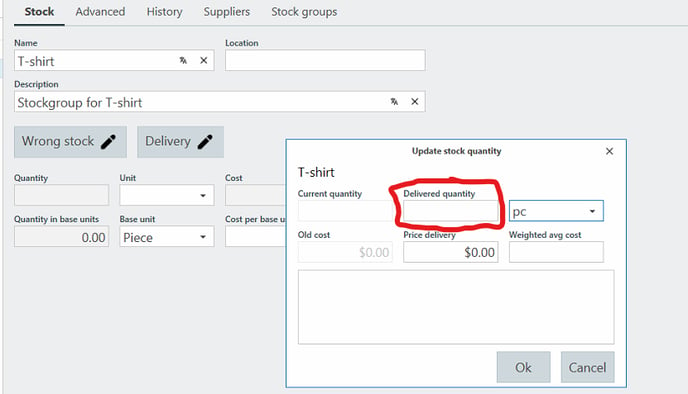
After that, it will be updated in the sales screen (let's say 100 pieces)
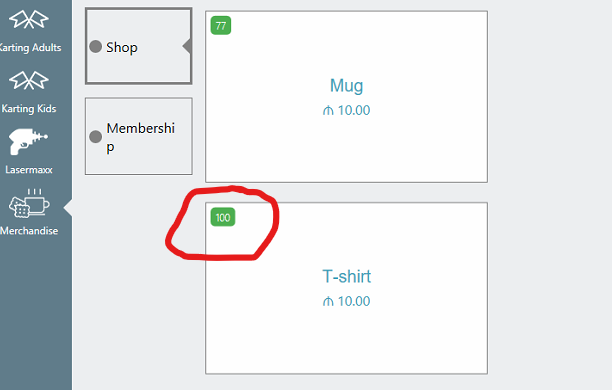
This count will be going down with every sale you do of this product.
4. Correcting the wrong stock count (if any).
For whatever reason, you found your stock was entered wrongly and you want to edit the count of your stock in the software. Here is what you need to do:
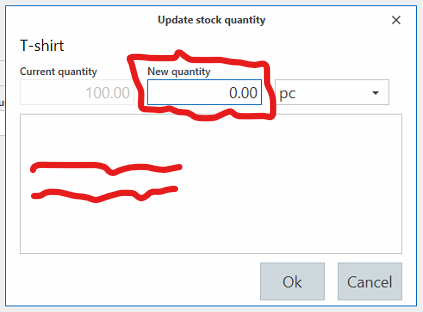
a- Click on (Wrong stock)
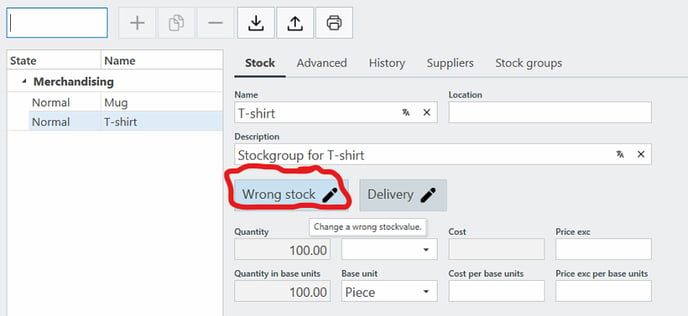
b- Add (the correct amount) and (Comment or the reason of the correction)
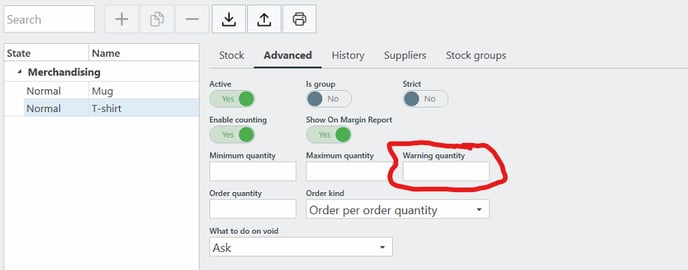
5. Adding warning messages mentioning that your stock reached specific limit?
For example, you want to have a warning message to remind you that your stock reached a specific level so you can start calling the supplier to order them.
You can set this kind of warning message.
a- Click on (Advanced)
b- Put the warning quantity you want. So If you put 70, means when your quantity goes under 70, you will get this warning message every time you sell that product.
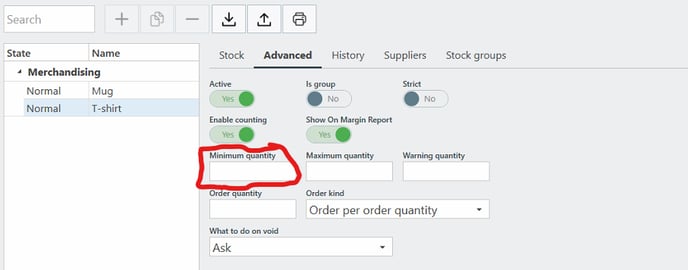
6. Blocking the selling of the product when it reaches a specific level of stock.
In this situation, let's say you want to reserve 40 T-shirts cause there are group of people coming tomorrow and it is high priority for you that you want to make sure this quantity of 40 T-shirts will be available no matter what!
In this case, you can set that limit of the stock , so when you reach this stock, it will block your receptionist from selling it in the reception area!
You need to set the minimum quantity to 40 according to our example.
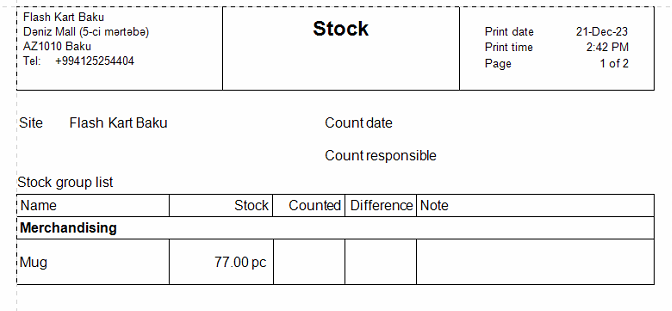
7. Stock Audit.
Whenever you want to do an audit of the stock, you can generate stock report (( From the top tabs, click on (STOCK) and then click on the printer icon )). Make sure that the default printer in the windows is set to A4 printer, or PDF, because if it is the ticket printer, the format will not be good.
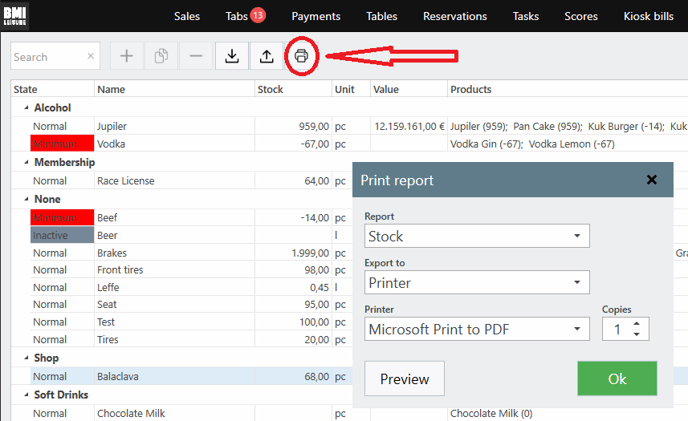
It will generate the list of products that has stock activated, with the count that you should find physically in your side.
For your general info, If you just activated a product today, that product in the stock report will very messy. You need to wait 1 day, then it will look fine.
The End :)